
 |
|
|||||||
| Technical Chat Ask and answer technical car questions. |
 |
|
|
Thread Tools |
|
|
#1 |
|
Nightwalker
Real Name: Austin Join Date: Dec 2002
Location: Oshkosh, WI
Posts: 4,063
Car: '13 WRX
YGBSM
|
Ok, I thought I would write up how I've been doing my own front wheel alignments in my garage. As always in today's world, I'll put a little disclaimer: I am not a professional mechanic, use the following procedures at your own risk, be careful when working with cars, use jackstands, hold your mother's hand when crossing the street, be cool - stay in school, etc. etc., yada yada.
I've been changing chassis setups on my car a lot this year in an effort to get the handling under control, so I got tired of going to an alignment shop and decided to do it myself. The procedure does take some work, but once you buy a couple of relatively inexpensive tools, you can re-align the car forever for free. Step 1: Find or make a flat, level surface. To really get the corner ride heights and the alignment correct, you need a flat, level surface to work with. Easier said than done; even those of us who have cement garage floors usually don't have a perfect surface. Mine looked okay visually, but I decided to survey it anyway. I went to Sears and got a laser level (~$40), 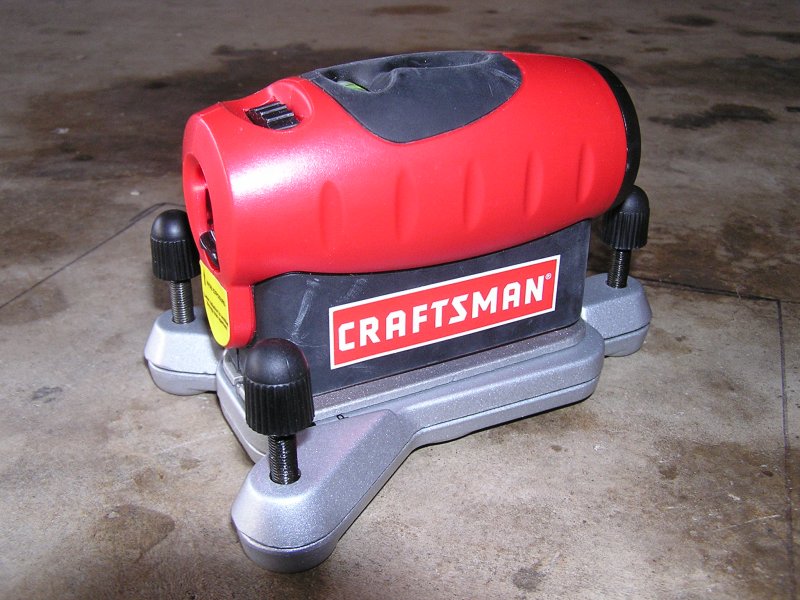 and a wood 2"x4" a couple feet long from the hardware store, which I cut into small sections. I then marked the positions of all 4 tires when the car was sitting in the garage, rolled the car outside, and put one of those wood blocks in each tire position (sorry if some of these pictures are kinda dark). 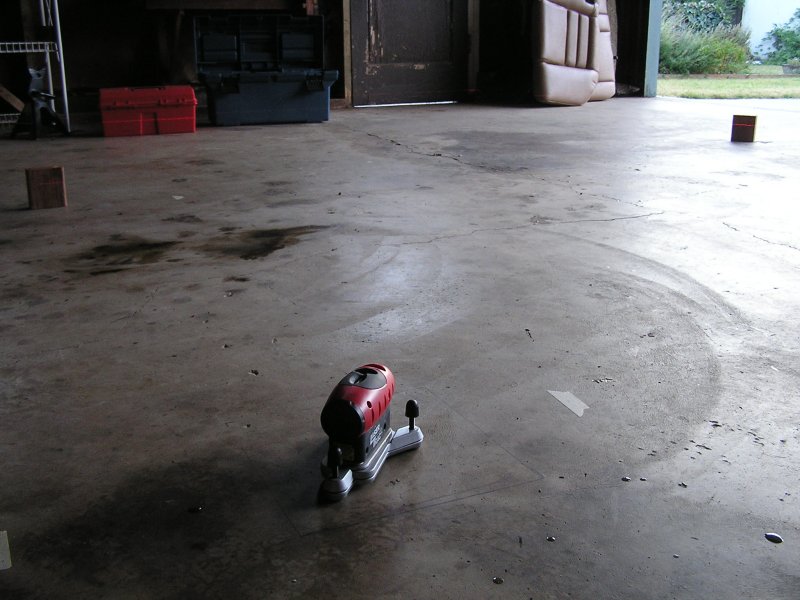 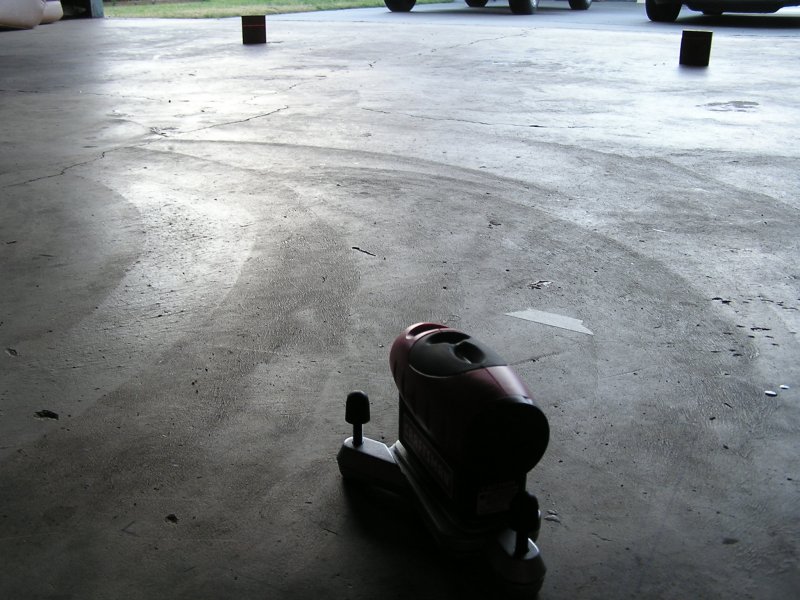 Then I recorded the height of the laser beam right in front of the level, 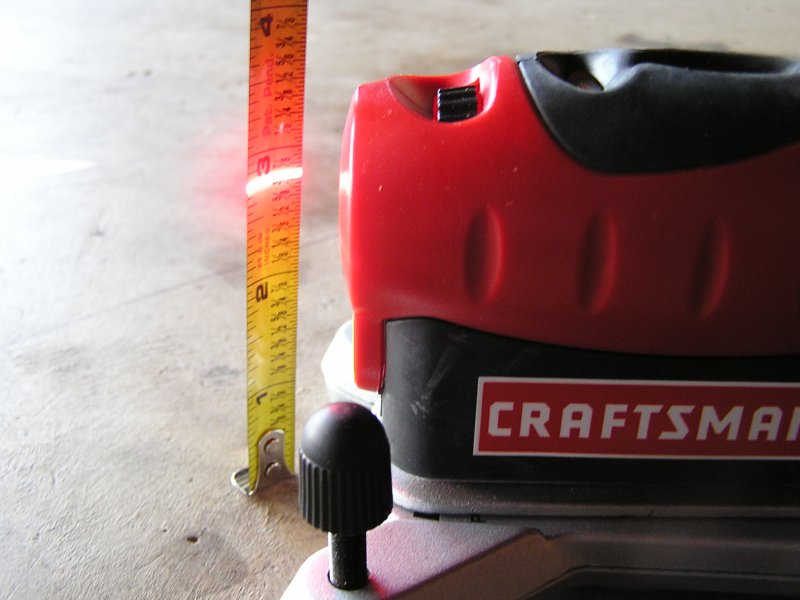 and at each of the three other tire positions. The measurement differences told me which tire positions needed to be shimmed up to achieve a level plane. 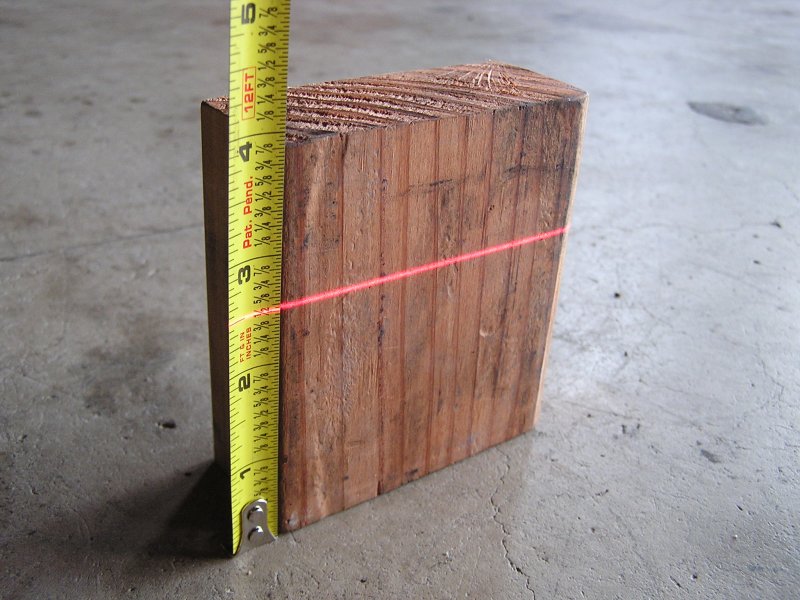 In my case, the LF tire position (which is where the laser level was) was the highest point, and the other tires needed to come up to match it. You can use pretty much anything as a shim; I went to Home Depot and got a sheet of 1/8" thick hardboard (maybe $5), which I cut into several tire-footprint-sized pieces so I could stack them on top of each other. 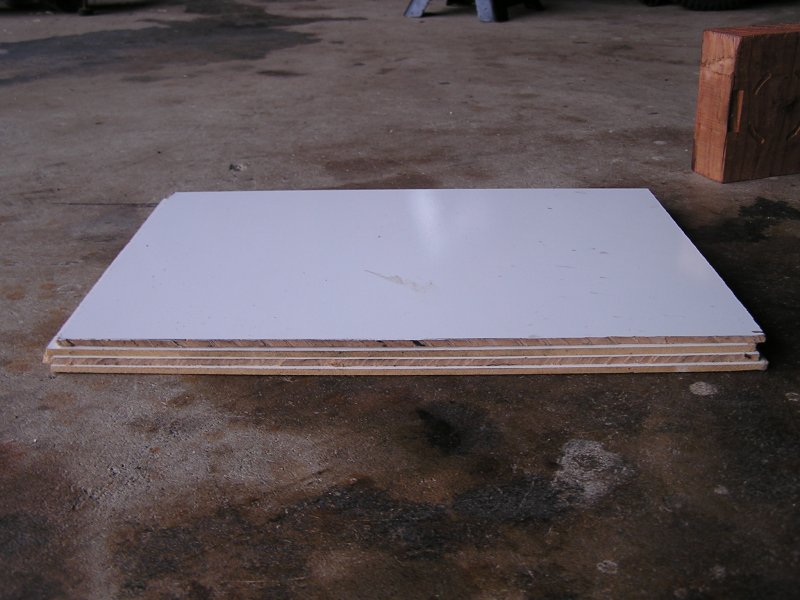 This way I had 1/8" adjustability in my leveling pads. If you wanted finer adjustment, you could use something thinner like sheet metal. 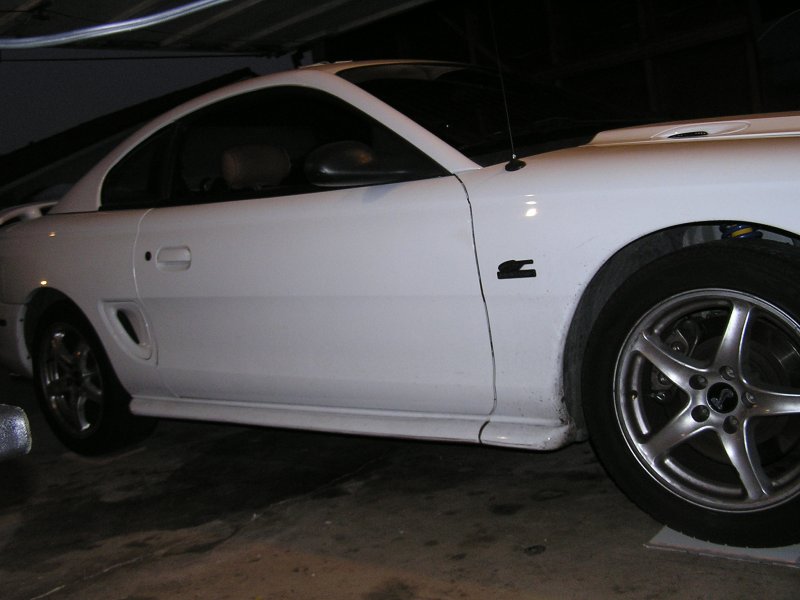 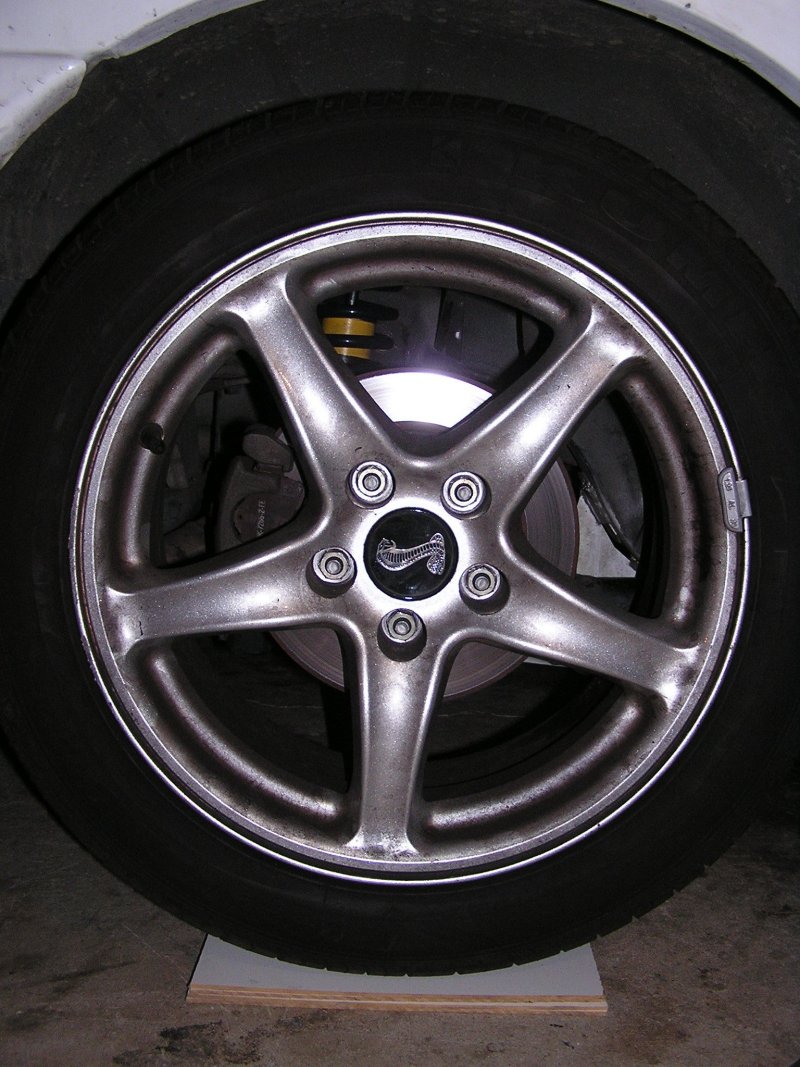 All this accomplishes the same thing that more expensive systems from outfits like Longacre sell for ~$360.  Step 2: Measure the car's ride heights and adjust to desired. Put the car in the spot you've selected for it and if necessary jack it up to slide your shims underneath the tires. If you want to be as accurate as possible with this whole alignment procedure, it's best to have the car at its race weight. You can put some stuff (or a person) in the driver's seat that approximates your weight, take out the spare tire, jack, etc. and any loose crap in the car, and try to have the approximate fuel load in the tank that you would race on. Here's a picture of the crap I threw into my car to approximate my weight, since I don't have any neat stacks of lead weights laying around (one of my wheels/tires together is near 50lbs, so that's 100lbs right there, and I weigh about 155lbs)... 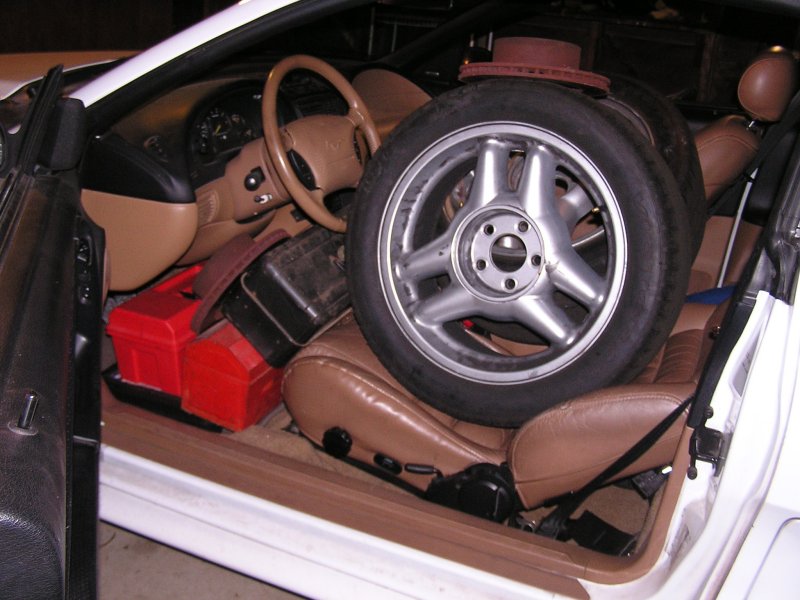 When you get the weight in there and you lower the car back down onto its leveling pads, bounce up and down on the front and rear ends of the car - this settles the chassis on the suspension and helps make sure the car is at its static height, so you get repeatable measurements. It's also a good idea to have something slippery under the front tires so they don't store any bind or resistance in them when you set the car back down; I've heard of some guys using a couple of sheet-metal plates with grease sandwiched between them, but I used the super-ghetto-fabulous newspaper method - which actually works pretty good. You just get 5 or 6 single sheets of typical newspaper cut down to your approximate tire size, and put them under the tire. Apparently the ink on the paper somewhat liquifies under the weight pressure from the car, so it slides around real nice. I've started measuring chassis ride height from the lower control arm (LCA) pivot points, in the front and rear. This picture shows one of the LCA bolts on the RF suspension; I measure from the floor to its centerline. Keep in mind that the measurement from the bolt to the floor will be off approximately the same amount you shimmed the tire up (if you had to use a shim at that tire). 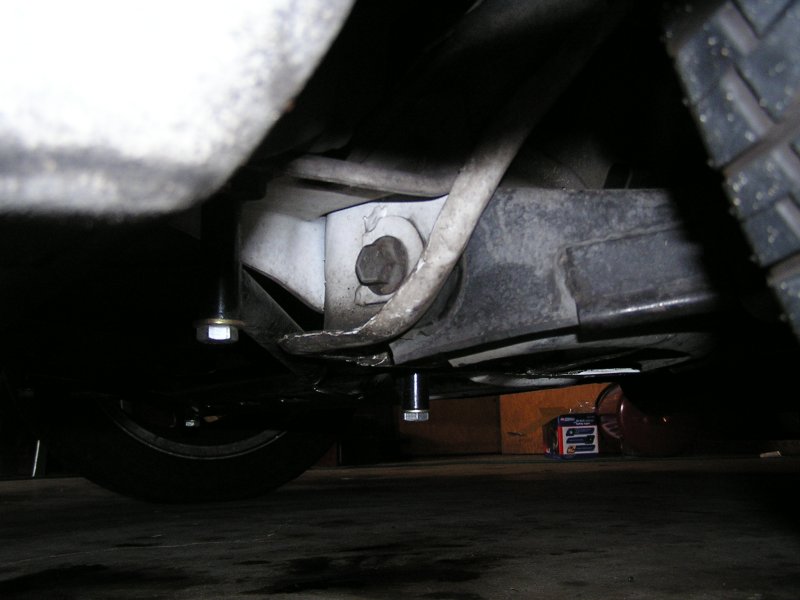 Once you have the ride height measurements of what you have currently (and BTW, it's really helpful to write everything you're doing down on paper - every measurement and angle - so you can easily keep track of it all), you can decide what changes you want to make and go around to each wheel and adjust accordingly. Jack the car up, take the wheel off, loosen the set screw on the lower spring perch, and adjust (since you have the height change you desire for that corner of the car in mind from your earlier chassis measurements, just measure the distance from the bottom of the threaded sleeve to the lower spring perch, add or subtract the change you want, and screw the lower perch up or down to meet the new number). 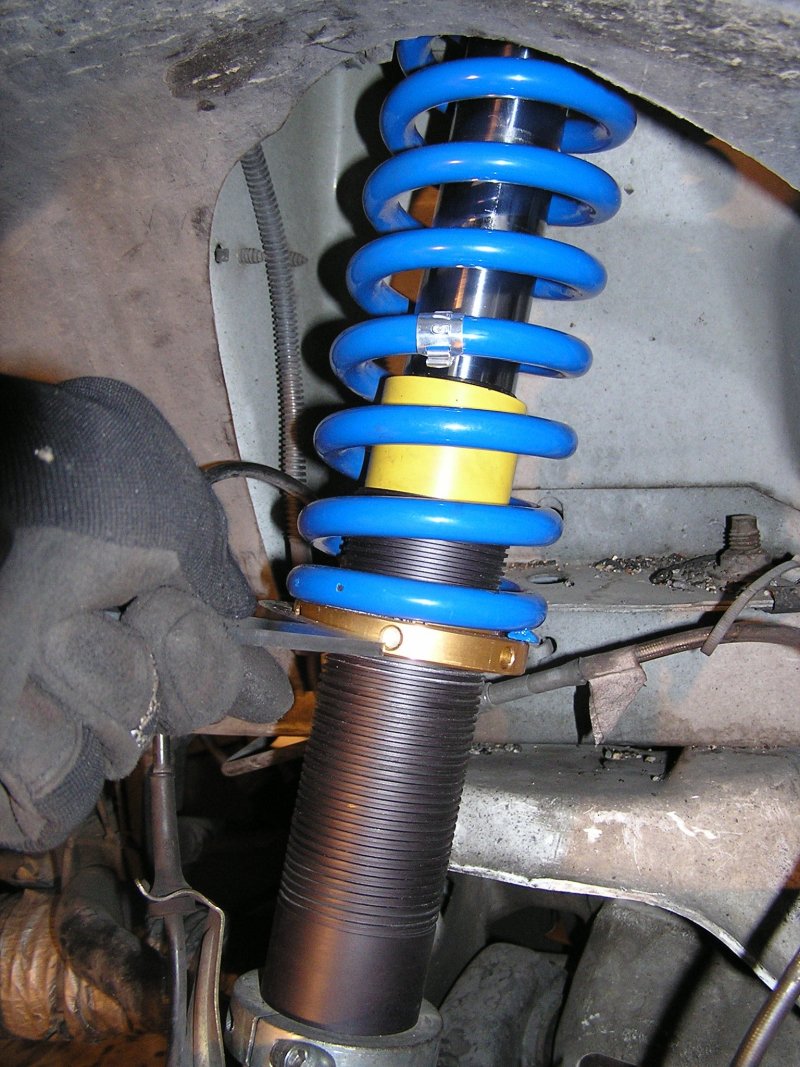 Once you've made your adjustments, set the car back down and once again bounce the front and rear ends of the car up and down; do this whenever you jack the car up and set it back down. Now go back to the top of step 2 and take your chassis ride height measurements again to make sure that your adjustments did what you wanted them to. Step 3: Measure and set the wheel alignments. Now that you have the ride heights set where you want, you can align the car. Remember that anytime the ride height changes, the wheel alignments will probably change. I'm not going to cover caster measurement & adjustment cause I haven't bothered with my car yet and don't have any pictures of it; I had the caster adjustment maxed out at about +5 degrees on both sides the last time I had my car aligned at a shop, and I haven't touched it since. As long as the caster is set equally when the front ride heights are equal, the caster should stay equal as you move the front end up and down for any desired ride height changes. I know my caster is symmetric, and it's maxed out with my current range of adjustment - that's good enough for me right now. If anybody needs to know the technique for caster, I can put it in later as an addendum. The alignment parameters that really change as a function of ride height are camber and toe. You need a gauge to measure camber, like this one I got from Maximum Motorsports for ~$60. 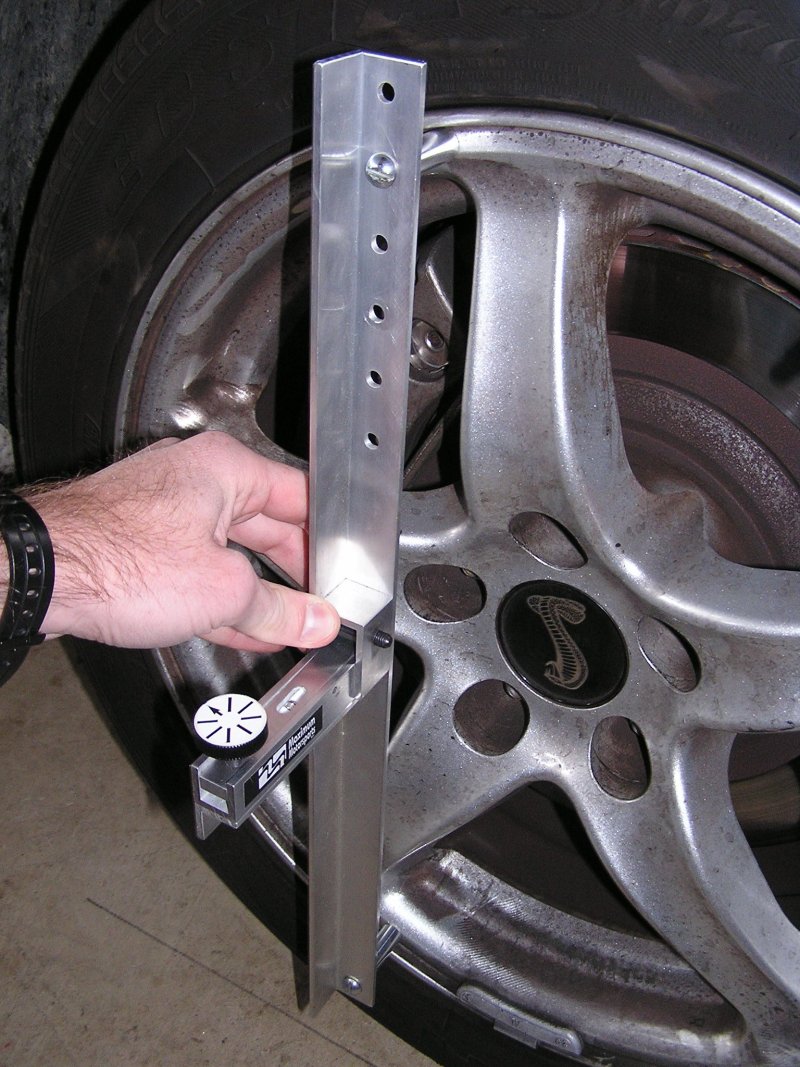 Just orient the gauge in the vertical direction and set it up against the flat part of the wheel. This particular gauge has a simple bubble-level in it; you start out the knob pictured at a starting location and turn the knob up or down until the bubble is leveled - each full turn of the knob represents 1 degree of camber. Regardless, whatever gauge you use should have instructions on how to use it. Once you've taken that reading on both sides, decide if it's what you want; if not, then it's time to adjust accordingly. My right-front caster/camber adjustment plates are shown below; the camber adjustment is the top plate and the caster adjustment is the bottom plate (the bronze/gold circular-looking thing visible underneath is the upper spring perch). 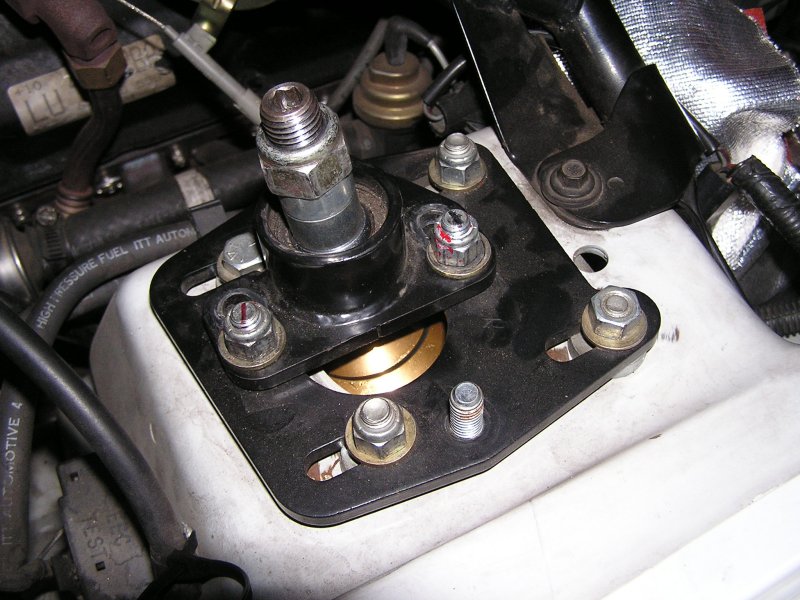 Loosen the bolts on the camber plate, slide the strut top where you want it (this might require jacking up the front end again if it doesn't want to move when the car is on the ground), tighten the bolts, and re-measure the camber. Depending on how precisely you want to adjust the camber, this might take a few iterations. Phew. Now that the camber is set, we're almost done. One last thing remains... the toe setting. There are several different ways you can measure toe; some are more accurate than others. A real quick and dirty way is to simply stick two flat plates against the outer sidewalls of the pair of tires, and measure the distance between the front and rear edges of the plates. The difference between them is the toe setting. This is not real accurate however, due to imperfections in the tire sidewalls, sidewall lettering, plates that aren't the exact diameter of the tires, etc. I've stayed away from measuring off the tire sidewalls at all. The method I've used is what I believe to be one of the more accurate methods; dropping a plumb bob on a string down to the ground from the front and rear midpoints of each front tire. First I establish where the wheel center is, and mark the sidewalls at front and rear... 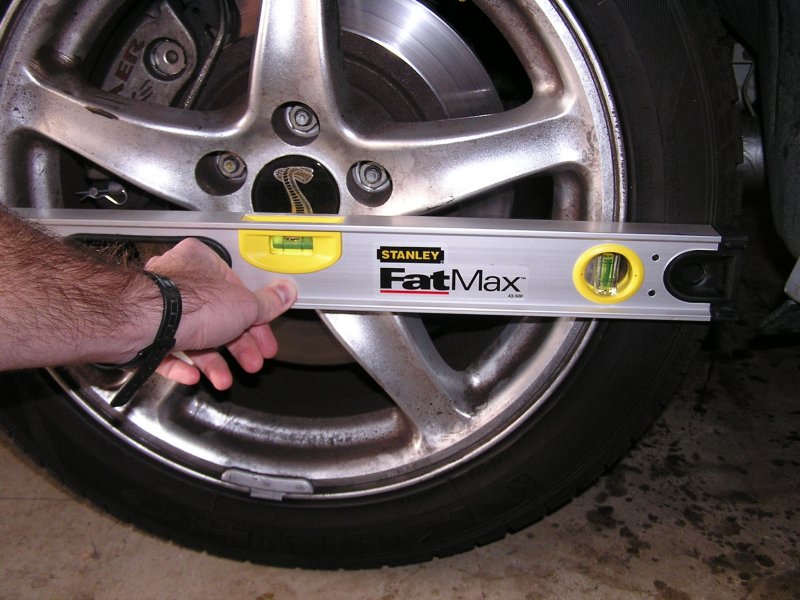 then I just follow that wheel centerline around to the midpoint of the tread (made easy with Kumho 712's, since they have that nice center groove all the way around the tire), drop my plumb bob on a string down to the ground and make a mark on the floor with a pencil, pen, whatever(you can put some masking tape down to mark on if you're worried about marking up your garage floor). Do this at the front and rear tread midpoints of both front tires. 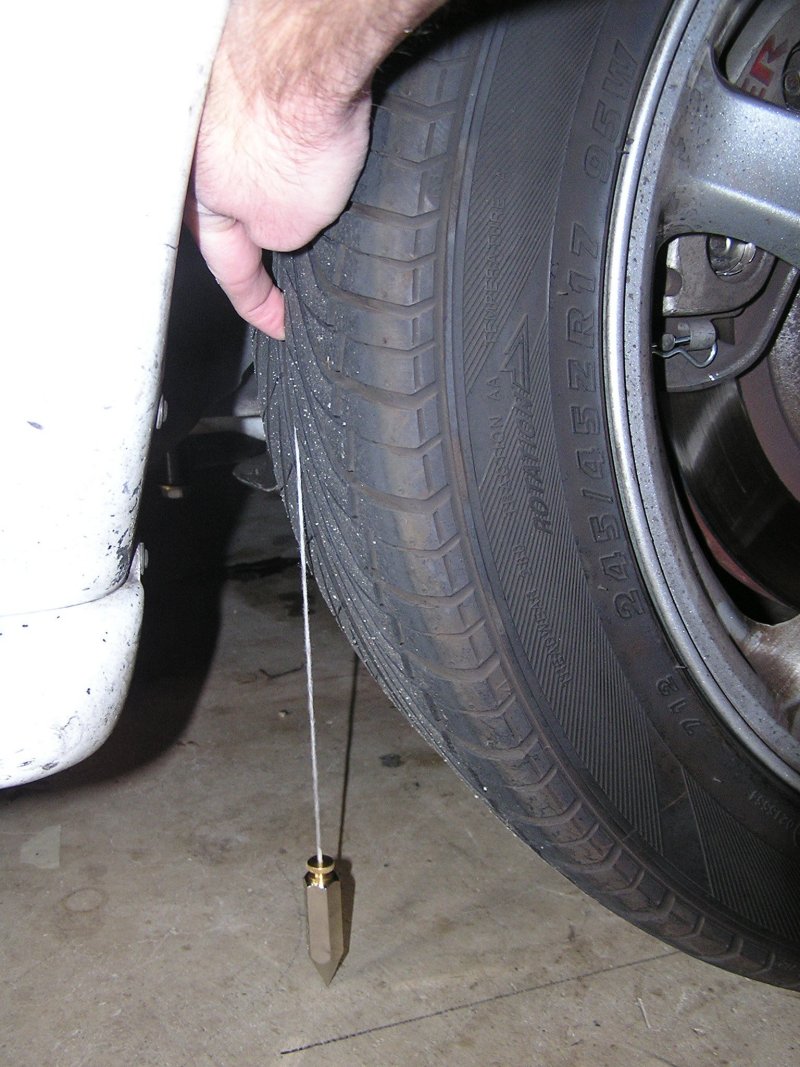 Then, get a tape measure that reads to at least 1/16" of an inch (if you Subie guys are using metric, tough noogies 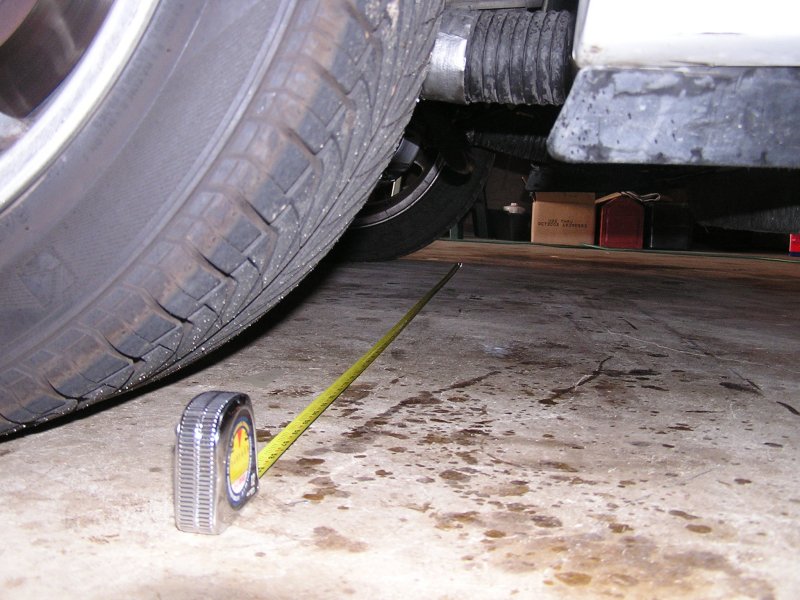 The difference between them is the toe - 0 means the two tires are parallel, longer measurement in front means toe-out, longer measurement in the rear means toe-in (1/8" longer between the front marks would mean you have 1/8" toe-out). If the toe (magically) happens to be where you want it, great, you're done! If like me however you happen to get 5/8" toe-out once you're done setting ride heights and camber, you need to adjust. Unfortunately I don't currently have any pictures of this last step, but it's pretty simple. A look in your shop manual should probably show you pictures of the steering tie-rods on your particular car. You need to loosen the jam nuts on the tie-rod ends and turn the inner tie-rods in or out (depending on toe-in or toe-out) however many turns are necessary to correct the toe - you'll have to experiment to see what is necessary. On my car I found out that one full revolution of an inner tie-rod is about a 1/16" adjustment. So if I crank both the left and right side tie-rods one full turn, I just changed the toe 1/8". I'm sure Subarus will be different. :wink: SO, that's pretty much the end of this little adventure. I know at first glance it looks like a shite-load of work, but once you do it a couple times it's not that bad. Plus, 1) you don't have to pay for it, 2) you can do it anytime you want to, 3) you don't have to let some 18yr-old-nimrod-of-a-grease-monkey touch your car, and 4) you have complete control of your alignment, and the satisfaction of knowing it was done right (if you did everything correctly
__________________
"None of you seem to understand. I'm not locked in here with you.. you're locked in here with me." |
|
|

|
|
|
#2 |
|
The Doink
Real Name: Scott Join Date: Nov 2002
Location: Portland, OR
Posts: 20,335
Car: '09 OBXT, '02 WRX, '96 Miata
Class: PDX/TT-6
The way out is through
|
Awesome write-up man... as soon as I get some coil-overs, methinks I will invest in a level and camber gauge too!
Oh, and I appologize on Austin's behalf to all the "18yr-old-nimrod-grease-monkeys" on the board. BTW: Austin, you should link to this over on Corner-Carvers. I'm sure there's a bunch of people there that might be interested in a cheap DIY alignment!
__________________
Is you is, or is you ain't, my con-stit-u-ints? |
|
|

|
|
|
#3 |
|
El Matador
Real Name: Matt Join Date: Dec 2002
Location: Reno, NV
Posts: 10,660
Car: 2012 Toyota Tacoma
Class: ?
|
Seriously! that is a great write up. I read the whole thing and I'm positive there are a lot of people out there who don;t know the proper way to do that, and that would be a great help to a lot of people. I used to do similar alignment work with my Jeep, (I had quite a bit of adjustability built in), but this is documented so well. Nice work man.
__________________
"Dallas..We have a problem.” |
|
|

|
|
|
#4 |
|
Nightwalker
Real Name: Austin Join Date: Dec 2002
Location: Oshkosh, WI
Posts: 4,063
Car: '13 WRX
YGBSM
|
Thanks guys! I wanted to pass on what I learned from researching and trying this myself. When I was researching it, I never really found a completely documented alignment write-up from start to finish anywhere, so I thought I'd try and make one for everyone else.
__________________
"None of you seem to understand. I'm not locked in here with you.. you're locked in here with me." |
|
|

|
|
|
#5 |
|
EJ207
Join Date: Dec 2002
Location: 39n53, 119w90
Posts: 2,698
Car: RX-8
Class: CS maybe
|
This is EXCELLENT!
Ok, I know I'm not knowledgeable about this stuff, too, but I just never would have thought about putting weight in the car to define actual driving condition. I wonder if alignment shops do that? |
|
|

|
|
|
#6 |
|
Nightwalker
Real Name: Austin Join Date: Dec 2002
Location: Oshkosh, WI
Posts: 4,063
Car: '13 WRX
YGBSM
|
I've never seen an alignment shop worry about weight loading, all they usually deal with are passenger cars/SUV's and customers that don't care if the camber is off by 0.2 degrees when they sit in it.
__________________
"None of you seem to understand. I'm not locked in here with you.. you're locked in here with me." |
|
|

|
|
|
#7 |
|
EJ207
Join Date: Dec 2002
Location: Reno, NV
Posts: 3,707
Car: 2011 Chevy Battle Wagon
|
Great write up and excellent pics. Thanks Man!
__________________
Captain Murphy: I dub thee Sir Phobos, Knight of Mars, beater of ass. Be a hitter, babe. |
|
|

|
|
|
#8 |
|
Nightwalker
Real Name: Austin Join Date: Dec 2002
Location: Oshkosh, WI
Posts: 4,063
Car: '13 WRX
YGBSM
|
I also posted this thread on Corner-Carvers, and other people have chimed in with more good tech. One guy posted his method for doing it the ghetto-fab (read: even cheaper) way without a camber gauge, plus how to measure caster.
http://corner-carvers.com/forums/sho...542#post156542
__________________
"None of you seem to understand. I'm not locked in here with you.. you're locked in here with me." |
|
|

|
 |
|
|
 Similar Threads
|
||||
| Thread | Thread Starter | Forum | Replies | Last Post |
| Dyno Numbers | Dean | Technical Chat | 519 | 2019-02-24 10:29 AM |
| OEM skid plate for MY 04+ WRX $20 | cody | User Classifieds | 18 | 2007-01-22 07:05 PM |
| Any good 4 wheel alignment shops? | jdk | Technical Chat | 22 | 2006-08-08 01:23 PM |
| New Wheel Pics | MattR | Off Topic Chat | 12 | 2006-04-16 08:25 PM |
| Clutch replaced | dknv | General Subaru Discussion & Club Chat | 19 | 2003-03-13 09:49 AM |